Deadlifts don't destroy backs. Bad deadlifts do. If your lower back is sore every Tuesday and tight every Thursday, the lift isn't punishing you for doing it — the mechanics are failing in one of three specific ways. Fix those and the deadlift becomes one of the safest compound lifts you can run.
I've coached a couple hundred deadlifts over the years and reviewed film of several hundred more. The pattern that produces lumbar complaints is almost always the same three failures, in some combination. It's not the weight. It's not the frequency. It's the execution.
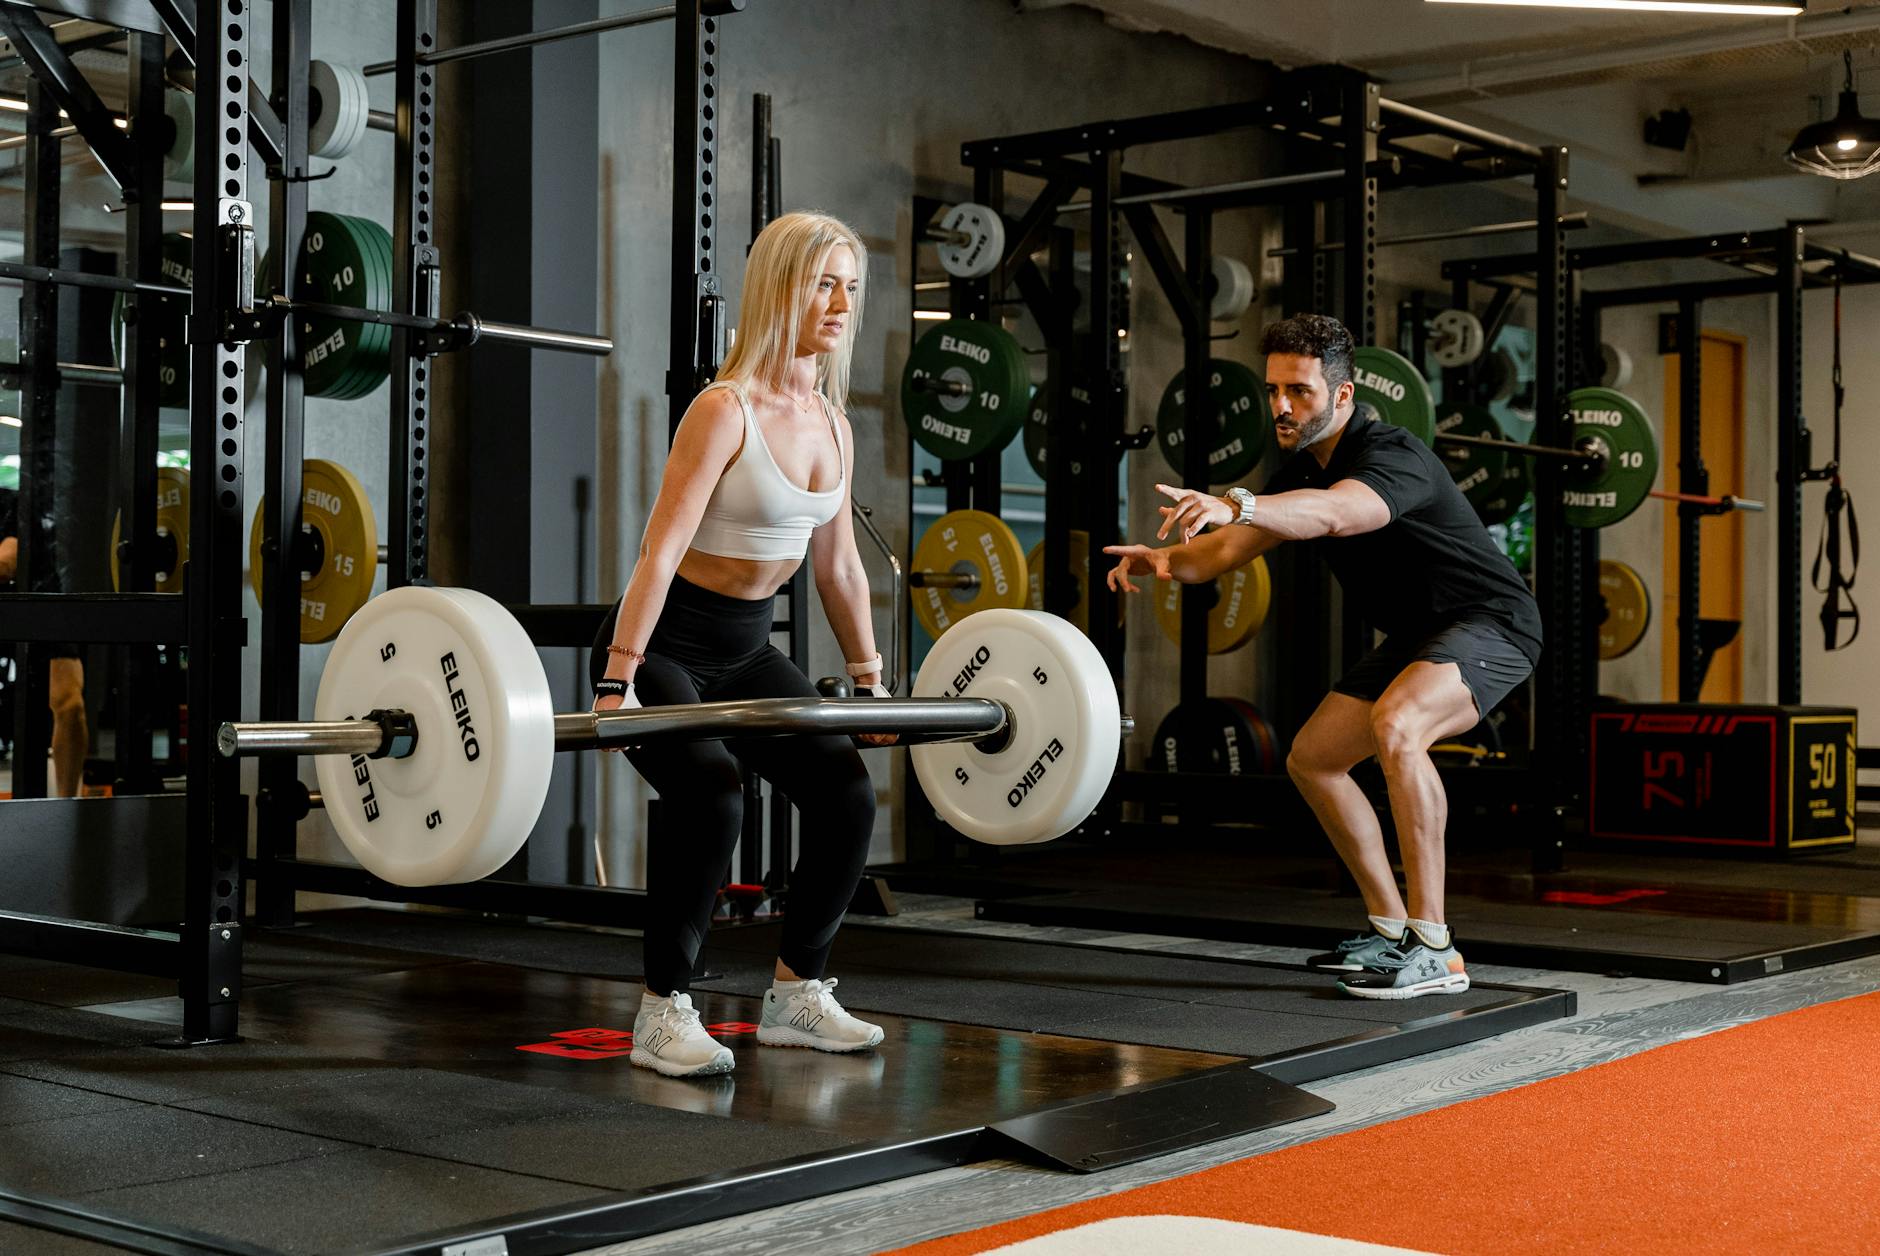
The three failures that cause back pain
1. Hips rise before the bar moves
This is the classic. Lifter sets up, starts the pull, and the hips shoot up an inch before the bar breaks the floor. That inch shifts the deadlift from a hip-hinge pattern to a stiff-leg back extension. The lumbar spine is now the primary mover — which it is not built to be under 405 pounds.
Film fix: shoot a side-on video of your deadlift from 15 feet away. If the hips move up before the bar leaves the floor, you've got this problem. Even by a single frame at 30 fps, that's enough to loud-up your back.
Cue that works: "Push the floor away." That shifts attention from pulling up with the back to extending at the knees and hips simultaneously. It's not a perfect cue for everyone, but it fixes more hip-rise issues than any other cue I've tried.
2. Bar too far forward
The bar needs to start directly over the mid-foot and stay there through the entire pull. If it's even an inch in front of the mid-foot at the floor, the lift becomes a front-load pull for the spine. The lever arm on the lumbar spine is longer than it has any business being.
Setup fix: look down at the bar in your starting position. The bar should be roughly over your shoelaces — about 1 inch from your shins. If you can see bar space in front of your shoelaces, walk your feet forward until you can't.
Mid-pull fix: a lat-engaged starting position with the shoulders slightly in front of the bar keeps the bar from drifting out as you extend. If you feel the bar arc out in front of your knees mid-pull, you've lost lat engagement.
3. Bracing happens too late
Bracing — the 360-degree intra-abdominal pressure — needs to be fully locked before the bar leaves the floor. A lot of lifters brace partially, start the pull, then brace harder as the weight gets heavy. By that point, the spine has already moved, and the bracing is catching up to damage already done.
Protocol fix: sequence the breath. Take a large breath into the belly (not the chest) during setup, brace 360 degrees as hard as you can, and hold that brace for the entire rep. Breathe between reps, not during them. If you exhale mid-pull, you've lost the pressure that was protecting the lumbar spine.
The setup checklist
Every deadlift rep should pass through these checkpoints before the bar moves:
- Feet hip-width, bar over mid-foot, shoelace gap
- Shins touch the bar after you bend the knees forward into position
- Hips higher than knees, back flat, chest up
- Shoulders slightly in front of the bar — lats engaged, armpits pointing at the ceiling
- Big breath, hard brace, full 360-degree pressure
- Pull — no yank, no jerk — smooth tension through the bar
Miss any of these, reset. A bad-setup rep is worth nothing but risk. Resetting costs 15 seconds. A strained back costs six weeks.
Sumo vs conventional
If your structure makes conventional deadlifts chronically uncomfortable regardless of setup, try sumo. Some lifters — wider build, shorter arms, specific hip anatomy — pull better and safer from a wider stance. The moment arm on the lumbar spine is shorter in sumo, which is protective.
There's no moral hierarchy between the two. Both are legitimate. If your body pulls sumo safely and conventional feels sketchy no matter what, run sumo. The purists are wrong about this one.
Rack pulls for partial ROM training
When you've got a lower back niggle that isn't bad enough to stop training but needs respect, rack pulls from 2 inches below knee height let you keep loading the back without pulling off the floor. They're not a substitute for the full lift — but they're a valid bridge during a recovery week or two.
What about belts?
A belt doesn't replace bracing. It amplifies it. Used correctly — pressing the abs out against the belt, not sucking in — a belt can add 10 to 20 pounds of safe training load. Used incorrectly, as a structural support that lets you skip bracing, it accelerates back problems rather than preventing them.
Use a belt for working sets above 80 percent of your max. Don't use it for warm-ups or lighter working sets — your naked bracing needs the practice.
Programming deadlifts safely
One heavy deadlift day per week. At 40-plus, once every 10 to 14 days. Total weekly volume under 20 heavy work reps (above 80 percent). Accessory pulls — RDLs, block pulls, deficits — can be added without the same recovery cost, but keep them under RPE 8.
Most deadlift programs I've seen fail aren't failing on intensity. They're failing on total pulling frequency. The lumbar spine does not recover from four heavy-pull sessions per week at 40-plus. Two is usually the cap, and one is often optimal.
When to stop and reassess
Sharp, specific lumbar pain during a pull means stop. Not "finish the set" — stop. Racked the bar, reset, and if the pain comes back on the next rep, you're done for the day. A deadlift-induced lumbar strain will extend your time under the bar for the next six weeks whether you train through it or not. The math favors stopping.
Dull, diffuse soreness 24 to 48 hours after a heavy pull session is normal. Sharp pain that changes how you walk is not. Learn the difference, and trust the first.